Double click the active tab to temporarily hide the ribbon and double click again to display.
This keytip displays the name of the command, the shortcut key if it has one and a short description
Every command on the ribbon also comes with a new shortcut. To invoke a command using the new ribbon shortcut key first press the Alt key to display the shortcut keys for each tab and also for the quick access toolbar. Then press the key for the tab you want and then press the key for the command you want.
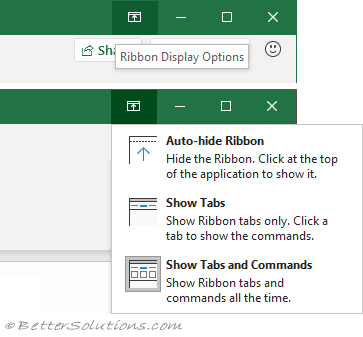
In the top right corner of the application window there is a Ribbon Display Options icon, next to the Minimise icon.
The tabs will be completely hidden and you will see a More button (three dots) in the top right corner.
Pressing Alt or the More button (top right corner) will display the tabs briefly.
This option will always maximise the application window.
Double clicking on the tabs will not change this view.
Selecting a tab will display the commands briefly.
The double clicking provides a quick way of togglying between the "Show Tabs" and the "Show Tabs and Commands" view.
All the tabs and their commands will be visible all the time.
The double clicking provides a quick way of togglying between the "Show Tabs" and the "Show Tabs and Commands" view.
When this is not ticked your display options will default to "Show Tabs and Commands". This is the default.
When this is ticked your display options will default to "Show Tabs".
This option is only updated when Excel is closed and reopened.
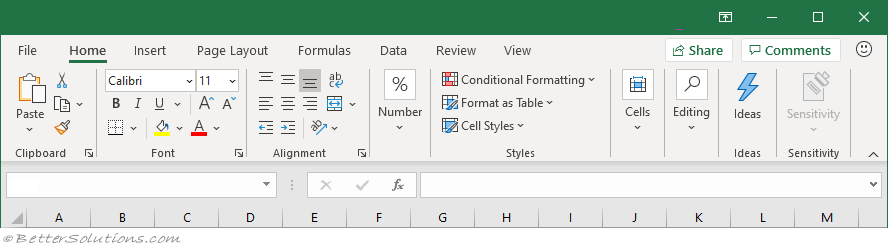
You can display the "Format Cells" dialog box, Font tab, by clicking on the dialog box launcher in the bottom right corner of this group.
You can display the "Format Cells" dialog box, Alignment tab, by clicking on the dialog box launcher in the bottom right corner of this group.
You can display the "Format Cells" dialog box, Number tab, by clicking on the dialog box launcher in the bottom right corner of this group.
link - docs.microsoft.com/en-us/microsoft-365/compliance/sensitivity-labels-sharepoint-onedrive-files?view=o365-worldwide
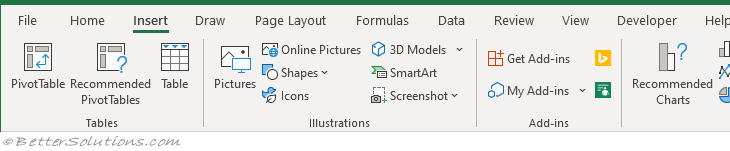
Insert Tab
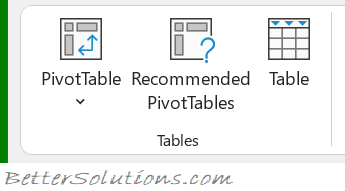
Tables
PivotTable - Button with Drop-Down. Displays the "PivotTable from table or range" dialog box. The drop-down contained the commands: PivotTable and PivotChart. The PivotTable displayed the "Create PivotTable" dialog box and the PivotChart displayed the "Create PivotTable and PivotChart" dialog box.
Recommended PivotTables - Displays the "Recommended PivotTables" dialog box. This shows a list of customised pivot tables that are best for your data. If there are no recommendations then a blank pivot table is created.
Table - (Ctrl + T). Displays the "Create Table" dialog box. When you define your data as a table it makes it easier to sort, filter and apply formatting.
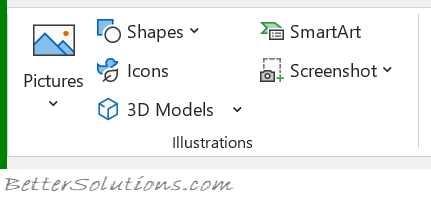
Illustrations
Pictures - (Changed in 365). Drop-Down. The drop-down contains the commands: This Device, Stock Images and Online Pictures. This Device displays the "Insert Picture" dialog box allowing you to browse to a file. Stock Images displays the Stock Image library dialog box. Online Pictures allows to you to browse images online.
Shapes - Drop-Down. The drop-down contains the commands: Recently Used Shapes, Lines, Rectangles, Basic Shapes, Block Arrows, Equation Shapes, Flowchart, Stars and Banners and Callouts.
Icons - Displays the "Insert Icons" dialog box. Insert an icon to visually communicate using symbols.
3D Models - Drop-Down. Insert a 3D model so you can rotate it and see it from all angles. The drop-down contains the commands: From a File and From Online Sources.
SmartArt - Displays the "Choose a SmartArt Graphic" dialog box which lets you choose from the following different types of smartart: List, Process, Cycle, Hierarchy, Relationship, Matrix, Pyramid, Picture and Office.com.
Screenshot - Drop-Down. The drop-down contains the commands: Available Windows and Screen Clipping. (Added in 2010).
Online Pictures - (Removed in 2021). Moved to the Pictures drop-down.
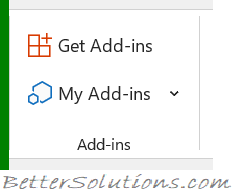
Add-ins
Get Add-ins - Displays the Office Add-ins window allowing you to see all the add-ins in the Office store.
My Add-ins - Button with Drop-Down. Displays the Office Add-ins window showing you all the add-ins you have currently installed.
Visio Data Visualizer Add-in - (Added in 365). An add-in can quickly create Visio flowcharts and organisation charts from your Excel data. This uses Office (Visio) Online to create the visualization.
Bing Maps Add-in - (Added in 365). This add-in can make it easy to plot locations and visualize your data using Bing Maps.
People Graph Add-in - (Added in 365). This add-in can transform data into an interesting picture.
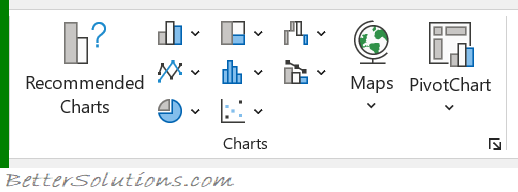
Charts
You can quickly display the "Insert Chart" dialog box by selecting your data and clicking on the dialog box launcher in the bottom right corner of the group. If a chart is active the "Change Chart Type" dialog is displayed.
Recommended Charts - Displays the "Insert Chart" dialog box (Recommended Charts tab).
Column or Bar - Drop-Down. The drop-down contains the commands: 2-D Column, 3-D Column, 2-D Bar, 3-D Bar and More Column Charts.
Line or Area - Drop-Down. The drop-down contains the commands: 2-D Line, 3-D Line, 2-D Area, 3-D Area and More Line Charts.
Pie or Doughnut - Drop-Down. The drop-down contains the commands: 2-D Pie, 3-D Pie, Doughnut and More Pie Charts.
Hierarchy - Drop-Down. The drop-down contains the commands: Treemap, Sunburst and More Hierarchy Charts.
Statistic - Drop-Down. The drop-down contains the commands: Histogram, Box and Whisker and More Statistical Charts.
Scatter XY or Bubble - Drop-Down. The drop-down contains the commands: Scatter, Bubble and More Scatter Charts.
Waterfall, Funnel, Stock, Surface or Radar - This drop-down contains the commands: Waterfall, Funnel, Stock, Surface, Radar and More Stock Charts.
Combo - Drop-Down. Use a combo chart when the range of values in the chart varies widely or you have mixed types of data. The drop-down contains the commands: Clustered Column-Line, Clustered Column-Line (secondary axis), Stacked Area Clustered Column or Create Custom Combo Chart.
Maps - Drop-Down. The drop-down contains the commands: Filled Map and More Map Options.
PivotChart - Button with Drop-Down. The button displays the "Create PivotChart" dialog box. The drop-down contains the commands: PivotChart and PivotChart and PivotTable.
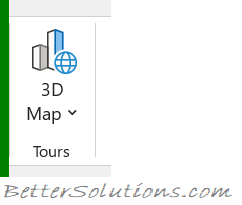
Tours
3D Map - Button with Drop-Down. The button displays the "Power Maps for Excel" window. The drop-down contans the commands: Launch Power Map and Add Selected Data to PowerMap. Allows you to create data visualisations in your workbooks. You must enable the Data Analysis add-ins to use this feature.
In Excel 2013 this functionality was made available by installing the Power Map add-in.
Reports
In Excel 2016 this group was removed.
In Excel 2013 this group is only displayed if you have the Power View add-in loaded.
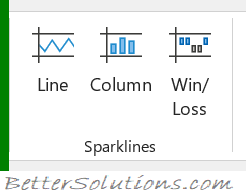
Sparklines
Line - Displays the "Create Sparklines" dialog box which lets you insert a line chart within a single cell.
Column - Displays the "Create Sparklines" dialog box which lets you insert a column chart within a single cell.
Win/Loss - Displays the "Create Sparklines" dialog box which lets you insert a win/loss chart within a single cell.
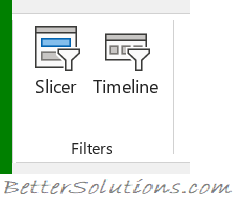
Filters
Slicer - Filter dates in your Tables. Exactly the same command can be found on the Table Tools - Design Tab.
Timeline - Filter dates in your tables, pivot tables and pivot charts.
Links
Link - Button with Drop-Down. (Ctrl + K). Displays the "Insert Hyperlink" dialog box. The drop-down contains a list of recent items. Previously called Hyperlink.
Comments
Comment - Insert a note into the active cell.
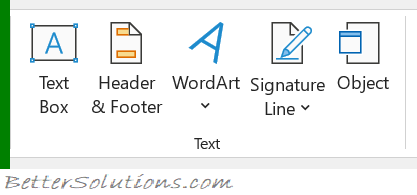
Text
Text Box - Inserts a textbox that can be positioned anywhere on the page.
Header & Footer - Switches to Page Layout view and automatically puts your cursor in the header box. This will then display the "Header & Footer Tools - Design" contextual tab. To exit just click out of the header or footer.
WordArt - Drop-Down. Gives you a choice of Word Art styles to insert. The drop-down contains a gallery of different styles.
Signature Line - Button with Drop-Down. The button inserts a signature line that specifies the individual who must sign. The drop-down displays the commands: Microsoft Office Signature Line and Add Signature Services.
Object - Displays the "Object" dialog box allowing you to insert embedded objects.
Symbols
Equation - Drop-Down. The drop-down contains the commands: Area of Circle, Binomial Theorem, Expansion of a Sum, Fourier Series and Insert New Equation.
Symbol - Displays the "Symbol" dialog box.
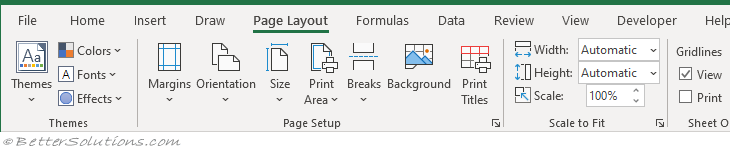
Page Layout Tab
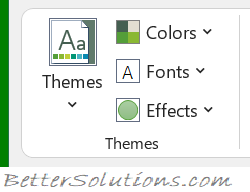
Themes
Themes - Drop-Down. Changes the overall look and feel of your workbook including colours, fonts and effects. The drop-down contains the commands: Built-in, More Themes on Microsoft Office Articles (Removed in 2010), Browse for Themes and Save Current Theme. The built-in themes are: Office, Facet, Integral, Ion, Boardroom, Organic, Retrospect, Slice, Wisp, Berlin and Frame. Tooltip indicates the current theme. The default theme is "Office".
Colors - Drop-Down. Displays a list of all the available colours and lets you change the colour component of the active theme. The drop-down contains the commands: Built-in and Customize Colors.
Fonts - Drop-Down. Displays a list of all the available fonts and lets you change the font component of the active theme. The drop-down contains the commands: Built-in and Customize Fonts.
Effects - Drop-Down. Displays a list of all the available effects and lets you change the effect component of the active theme. The drop-down contains the commands: Office, Office 2007-2010, Subtle Solids, Banded Edges, Smokey Glass, Glow Edge, Grunge Texture, Frosted Glass, Top Shadow, Inset, Milk Glass, Riblet, Reflection, Extreme Shadow, Glossy.
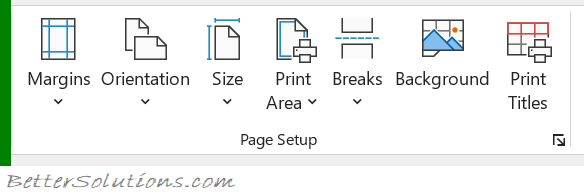
Page Setup
You can quickly display the "Page Setup" dialog box, Page tab, by clicking on the launcher in the bottom right corner of this group.
Margins - Drop-Down. Lets you choose from one of your built-in margin settings or lets you customise your own. The drop-down contains the commands: Normal, Wide, Narrow and Custom Margins. The Custom Margins displays the "Page Setup" dialog box, Margins tab.
Orientation - Drop-Down. Lets you switch between Portrait and Landscape.
Size - Drop-Down. Lets you select from all the different available paper sizes. The More Paper Sizes displays the "Page Setup" dialog box, Page tab.
Print Area - Drop-Down. This drop-down contains the commands: Set Print Area and Clear Print Area.
Breaks - Drop-Down. This drop-down contains the commands: Insert Page Break, Remove Page Break and Reset All Page Breaks.
Background - Displays the "Sheet Background" dialog box to let you add a background image to the back of a worksheet. This caption changes to 'Delete Background' if an image is assigned to the active worksheet.
Print Titles - Displays the "Page Setup" dialog box, Sheet tab. This allows you to enter rows or columns to repeat.
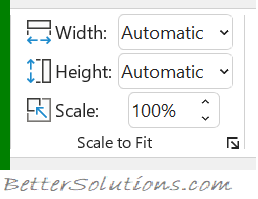
Scale to Fit
You can quickly display the "Page Setup" dialog box, Page tab, by clicking on the launcher in the bottom right corner of this group.
Width - Choice of 1 to 9 pages. The combo box contains Automatic, 1 to 9 pages and More Pages. The More Pages displays the "Page Setup" dialog box, Page tab. Provides a shortcut to (Page Setup)(Page tab, Scaling).
Height - Choice of 1 to 9 pages. The combo box contains Automatic, 1 to 9 pages and More Pages. The More Pages displays the "Page Setup" dialog box, Page tab. Provides a shortcut to (Page Setup)(Page tab, Scaling).
Scale - Changes the page scale in increments of 5%. Provides a shortcut to the (Page Setup)(Page tab, Scaling).
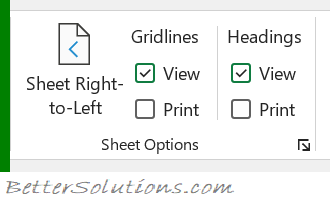
Sheet Options
You can quickly display the "Page Setup" dialog box, Sheet tab, by clicking on the launcher in the bottom right corner of this group.
Sheet Right to Left - (Added in 365). Switch the sheet direction to the first column is on the right hand side.
Gridlines View - Toggles the display of gridlines on the active worksheet. Provides a shortcut to (Page Setup)(Sheet tab, "Gridlines").
Gridlines Print - Toggles whether the gridlines are printed. Provides a shortcut to (Excel Options)(Advanced tab, "Show gridlines").
Headings View - Toggles the displays of row and column headers on the active worksheet. Provides a shortcut to (Excel Options)(Advanced tab, "Show row and column headers").
Headings Print - Toggles whether the row and column headers are printed. Provides a shortcut to (Page Setup)(Sheet tab, "Row and column headings").
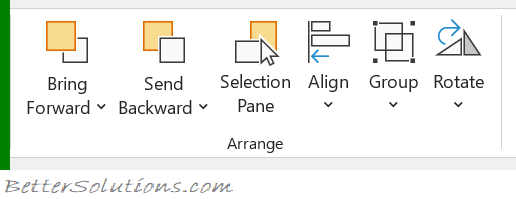
Arrange
This whole group also appears on the Drawing Tools - Format Tab, Picture Tools - Format Tab.
Bring Forward - Button with Drop-Down. The button brings the selected object forward one level. The drop-down contains the commands: Bring to Front and Bring Forward. Bring to Front will bring the selected object in front of all the other objects.
Send Backward - Button with Drop-Down. The button brings the selected object back one level. The drop-down contains the commands: Send to Back and Send Backward. Send to Back will send the selected object to the back of all the other objects.
Selection Pane - Drop-Down. Displays the Selection Task Pane.
Align - Drop-Down. This drop-down contains the commands: Align Left, Align Center, Align Right, Align Top, Align Middle, Align Bottom, Distribute Horizontally, Distribute Vertically, Snap to Grid, Snap to Shape, View Gridlines.
Align (Word extras) Align to Page, Align to Margin, Align Selected Objects, View Gridlines and Grid Settings.
Align (PowerPoint extras) Align to Slide, Align Selected Objects, View Gridlines and View Settings.
Group - Drop-Down. This drop-down contains the commands: Group, Regroup and Ungroup.
Rotate - Rotate or flip the selected object. Drop-Down. This drop-down contains the commands: Rotate Right 90, Rotate Left 90, Flip Vertical, Flip Horizontal and More Rotation Options.
Formulas Tab
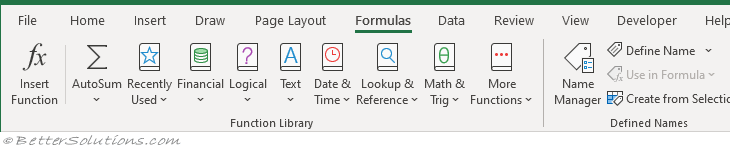
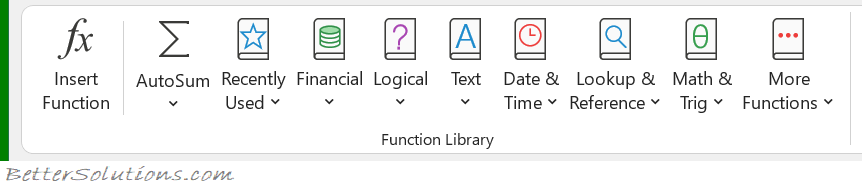
Function Library
Insert Function - (Shift + F3). Drop-Down. Displays the "Insert Function" dialog box allowing you to search for a particular function or display the list of functions by category.
AutoSum - Button with Drop-Down. The button inserts the Sum formula into the cell calculating the sum of the cells directly above. The drop-down contains the commands: Sum. Average, Count Numbers, Max, Min or More Functions. Exactly the same command can be found on the Home Tab.
Recently Used - Drop-Down. Provides quick access to the 10 functions you recently used.
Financial - Drop-Down. Provides quick access to all the functions in the Financial category.
Logical - Drop-Down. Provides quick access to all the functions in the Logical category.
Text - Drop-Down. Provides quick access to all the functions in the Text category.
Date & Time - Drop-Down. Provides quick access to all the functions in the Date & Time category
Lookup & Reference - Drop-Down. Provides quick access to all the functions in the Lookup & Reference category.
Math & Trig - Drop-Down. Provides quick access to all the functions in the Maths & Trigonometry category.
More Functions - Drop-Down. Displays a drop-down providing access to the Statistical, Engineering, Cube, Information, Compatibility and Web categories.
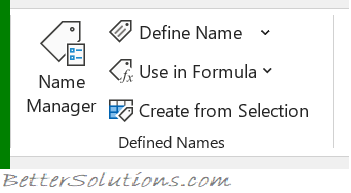
Defined Names
Name Manager - Displays the Name Manager dialog box.
Define Name - Button with Drop-Down. The button displays the "New Name" dialog box . The drop-down contains the commands: Define Names and Apply Names. The Define Names allows you to create workbook and worksheet level named ranges and displays the "New Name" dialog box. The Apply Names displays the "Apply Names" dialog box.
Use in Formula - Drop-Down. The drop-down contains a list of all the named ranges in the workbook (25 with scrolling) and Paste Names. The Paste Names command displays the "Paste Name" dialog box.
Create from Selection - Displays the "Create Names from selection" dialog box. This enables you to name a selected range of cells using a row or column title that you've entered.
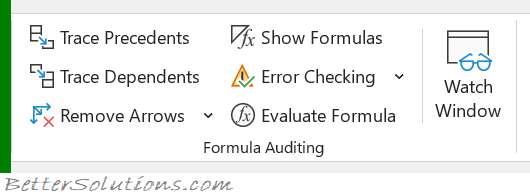
Formula Auditing
Trace Precedents - Displays arrows that indicate what cells affect the value of the currently selected cell.
Trace Dependents - Displays arrows that indicate what cells are affected by the value in the currently selected cell.
Remove Arrows - Button with Drop-Down. The button removes all the arrows drawn by the trace precedents and trace dependents. The drop-down contains the commands: Remove Arrows, Remove Precendent Arrows and Remove Dependent Arrows.
Show Formulas - (Ctrl + '). Toggles the display of the formulas rather than the result.
Error Checking - Button with Drop-Down. The button displays the "Error Checking" dialog box. The drop-down contains the commands: Error Checking, Trace Error and Circular References. The Circular References extension will only be enabled when the active workbook contains at least one circular reference.
Evaluate Formula - Displays the "Evaluate Formula" dialog box. This allows you to step through a formula calculation.
Watch Window - Displays the Watch Window. Allows you to view the contents of cells and their results as you make changes.
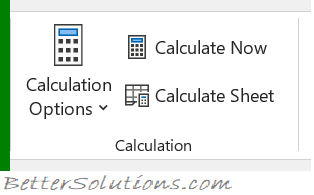
Calculation
Calculation Options - Drop-Down. The drop-down lets you quickly change the calculation setting in the active workbook between Manual, Automatic and Automatic except for Data Tables. This setting is in fact an application setting. For more information please refer to the Calculation page.
Calculate Now - (F9). Provides a shortcut to the (Excel Options)(Calculation tab, "Calc Now"). This option no longer appears on the Excel Options dialog box.
Calculate Sheet - (Shift + F9). Provides a shortcut to the (Excel Options)(Calculation tab, "Calc Sheet"). This option no longer appears on the Excel Options dialog box.
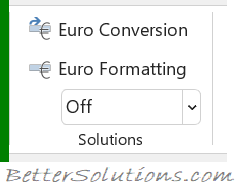
Solutions
This group is only displayed if you have the Euro Currency Tools add-in loaded.
Euro Conversion - Launch the Euro Conversion Wizard.
Euro Formatting - Apply Euro formatting to the selected cells.
Quick Conversion - Perform quick conversions.
Data Tab
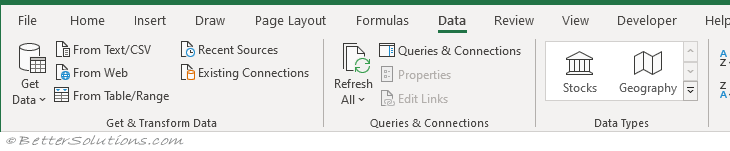
Get & Transform Data
Get Data - Drop-Down. Discover, connect and combine data from multiple sources. The drop-down includes the commands: From File, From Database, From Azure, From Online Services (New), From Other Sources, Combine Queries, Launch Query Editor (New), Data Source Settings and Query Options. more
From Text/CSV - Import data from a text, comma-separated value or formatted text (space delimited) file.
From Web - Import data from a web page.
From Table/Range - Create a new query linked to the selected table. If the selected range is not part of a table, it will be converted into a table.
Recent Sources - Manage and connect to recent sources.
Existing Connections - Import data from common sources.
Queries & Connections
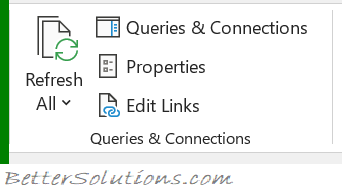
Refresh All - (Ctrl + Alt + F5). Button with Drop-Down. The button updates all the information in the active workbook coming in from external sources. The drop down includes the commands: Refresh, Refresh Status, Cancel Refresh and Connection Properties.
Queries & Connections - Displays the "Workbook Connections" dialog box. Data connections are links to data sources outside of this workbook.
Properties - This is only enabled when you select a cell that has been populated using an external connection.
Edit Links - Displays the "Edit Links" dialog box.
Data Types
These are called Linked Data Types because they have a connection to an online data source that allows you to refresh the information.
Stocks - (Added in 365). Converts the selected cells into a Stocks data type to easily retrieve financial information such as tickers, prices and other general company information.
more Currencies - (Added in 365). Converts cells with currency pairs separated by "/" or ":" such as "USD/EUR" into a Currency data type to get currency conversion rates.
Geography - (Added in 365). Converts the selected cells into a Geography data type to easily retrieve information on countries, regions, cities and populations.
more
Sort & Filter
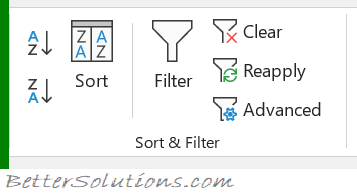
Sort A to Z - Sorts data alphabetically from A-Z and numerically from the lowest number to the highest.
Sort Z to A - Sorts data alphabetically from Z-A and numerically from the highest number to the lowest.
Sort - Displays the "Sort" dialog box.
Filter - Toggles filtering on the current selection.
Clear - Clears the filter and sort for the current selection.
Reapply - (Ctrl + Alt + L). Reapplies the filter and sort to the current selection.
Advanced - Displays the "Advanced Filter" dialog box.
more
Data Tools
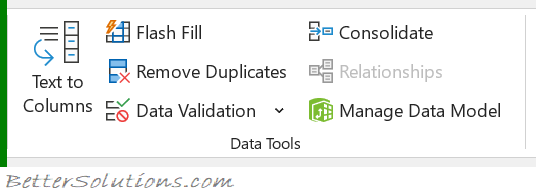
Text to Columns - Displays the "Convert Text to Columns Wizard" dialog box.
Flash Fill - Automatically fills in values.
more Remove Duplicates - Displays the "Remove Duplicates" dialog box. more
Data Validation - Button with Drop-Down. The button displays the "Data Validation" dialog box. The drop-down includes the commands: Circle Invalid Data and Clear Validation Circles.
more Consolidate - Displays the "Consolidate" dialog box. more
Relationships - Allows you to create or edit relationships between tables to show related data from different tables on the same report.
Manage Data Model - Opens the Power Pivot window. You must enable the Data Analysis add-ins to enable this feature.
more
Forecast
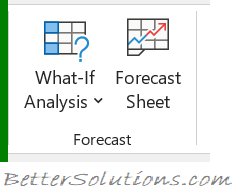
What-If Analysis - Drop-Down. The drop-down contains the commands: Scenario Manager, Goal Seek and Data Table.
Forecast Sheet - Displays the "Create Forecast Worksheet" dialog box that lets you forecast your timeline data.
more
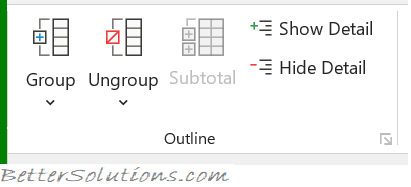
Outline
You can quickly display the "Settings" dialog box, by clicking on the dialog box launcher in the bottom right corner of this group.
Group - Button with Drop-Down. The button lets you group a selection of rows and columns. The drop-down also contains the commands: Group and Auto Outline. The Auto Outline command creates an automatic outline from the current region.
Ungroup - Button with Drop-Down. The button lets you remove the outlines from the current rows and columns. The drop-down contains the commands: Ungroup and Clear Outline. The Clear Outline command clears all the levels of outline.
Subtotal - Automatically insert subtotals for the selected rows.
Show Detail - Expand a collapsed group of cells.
Hide Detail - Collapse a group of cells.
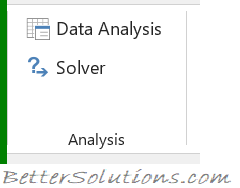
Analysis
This group will be only be displayed if you have either the Analysis-ToolPak add-in or the Solver add-in loaded.
Data Analysis - This is only displayed if you have the
Analysis-ToolPak add-in loaded. Displays the "Data Analysis" dialog box.
Solver - This is only displayed if you have the
Solver add-in loaded. Displays the "Solver Parameters" dialog box.
Review Tab
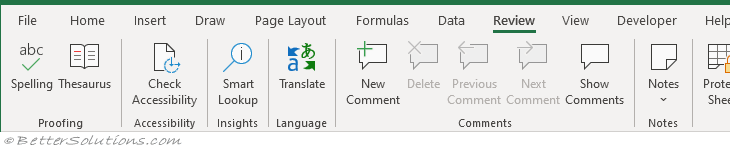
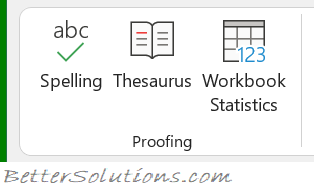
Proofing
Spelling - (F7). Displays the "Spelling" dialog box. Allows you to check the spelling on the active worksheet.
Thesaurus - Toggles the display of the Research task pane defaulting the research service to the thesaurus.
Workbook Statistics - (Added in 365). Displays a dialog box giving you the total number of different items in the active workbook.
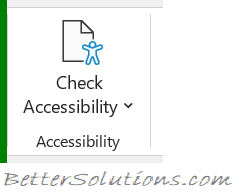
Accessibility
Check Accessibility - Displays the Accessibility Checker Task Pane. This identifies any aspects of your workbook that could be altered to assist people with disabilities.
Insights
Smart Lookup - Displays the Smart Lookup Task Pane. This is powered by Bing and provides wiki articles and top related searches from the web.
Language
Translate - Toggles the display of the Research task pane defaulting the research service to the translation.
Comments
New Comment / Edit Comment - (Shift + F2). Inserts a comment at the active cell.
Delete - Deletes the selected comment.
Previous Comment - Moves to the previous comment in the active workbook.
Next Comment - Moves to the next comment in the active workbook.
Show Comments - Toggles the display of the Comments task pane.
Show/Hide Comment - (Removed in 2019). Toggles the display of the comment in the active cell.
Show All Comments - (Removed in 2019). Toggles the display of comments in the active workbook (all worksheets).
Show Ink - (Removed in 2019). Show or hide ink in the active workbook. This is tablet specific.
Notes
Notes - (Added in 2019). Drop-Down. The drop-down contains the commands: New Note, Previous Note, Next Note, Show/Hide Note, Show All Notes and Convert to Comments.
Protect
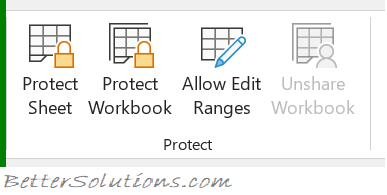
Protect Sheet - Displays the "Protect Sheet" dialog box.
Protect Workbook - The drop-down displays the following commands: Protect Structure and Windows as well other Restrict Permission options. These can only be used if you have IRM [link] installed.
Allow Edit Ranges - Allows specific users to edit certain ranges in a workbook or sheet. Before using this option you need to define your security settings using the Protect Sheet command. This command is disabled when the worksheet is protected.
Unshare Workbook - This is disabled by default. If you open a workbook that is currently being shared using the legacy "Share Workbook" feature this button will become enabled, allowing you to unshare the workbook. Shared workbooks have been replaced with
Co-Authoring. Press the 'Share' button in the top right corner to display the
Share Task Pane. Workbooks must be saved to an online location.
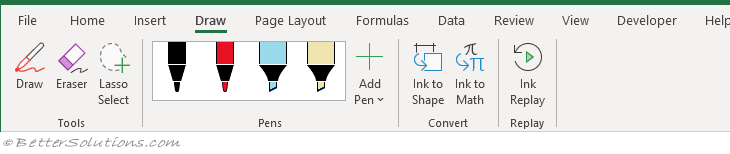
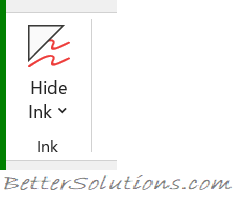
Ink
Hide Ink - Drop-Down. The drop-down contains the commands: Hide Ink, Delete All Ink on Sheet and Delete All Ink on Workbook.
View Tab
The commands for hiding and showing worksheets are on the
Home Tab under (Cells Group, Format > Unhide).
The commands for hiding and showing workbooks (and windows) can be found on this tab.
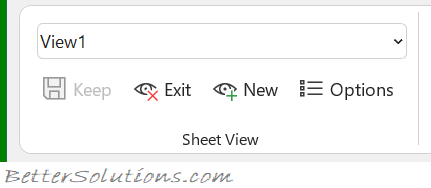
Sheet View
Lets you create different views of the same worksheet when you are collaborating with others.
Only enabled in Excel online or on the Desktop when your workbook has been saved in OneDrive.
Switch Sheet View - A drop-down list of all the different sheet views in this workbook for easy switching.
Keep - Saves the current view as a new sheet view.
Exit - Closes the current sheet view and returns back to the default view.
New - Lets you define a new sheet view. New views are given the name "Temporary View" until they have been saved.
Options - This will only be enabled when. Displays the "Sheet View Options" dialog box which allows you to rename, duplicate and delete as well as quickly switching between different views.
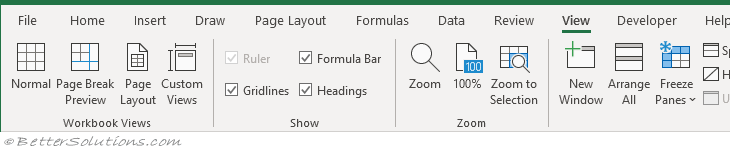
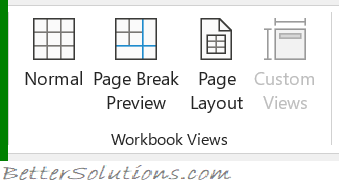
Workbook Views
Normal - Displays the worksheet in the normal view. There is also a shortcut to this view in the bottom right corner of the status bar.
Page Break Preview - Used for adjusting page breaks. There is also a shortcut to this view in the bottom right corner of the status bar.
Page Layout - Displays the worksheet as it will appear on a printed page. Displays a very useful horizontal and vertical ruler plus you can add/change headers and footers, check margins, row/column headings and scaling options. Not to be confused with Print Preview. There is also a shortcut to this view in the bottom right corner of the status bar.
Custom Views - Displays the "Custom Views" dialog box.
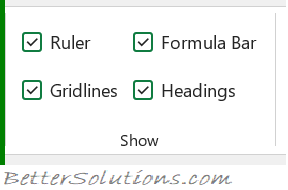
Show
Ruler - This will only be enabled when in Page Layout view. Toggles the display of the horizontal and vertical rulers. This is only available when you are in Page Layout view. You can change the units displayed from the (Excel Options, Advanced tab)(Display, Ruler Units). By default the ruler displays the default units that are specified in the control panel, regional settings. These units can be either inches, centimeters or millimeters.
Gridlines - Toggles the display of gridlines on the active worksheet. Provides a shortcut to (Excel Options, Advanced tab)(Display options for this worksheet, show gridlines).
Formula Bar - Toggles the display of the formula bar. Provides a shortcut to (Excel Options)(Advanced tab, Show formula bar).
Headings - Toggles the display of the heading rows. Provides a shortcut to (Excel Options)(Advanced tab, Show row and column headers).
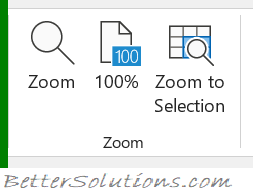
Zoom
Zoom - Displays the "Zoom" dialog box.
100% - Zoom the workbook to 100% of its normal size.
Zoom to Selection - Zoom the worksheet to display just the currently selected cells.
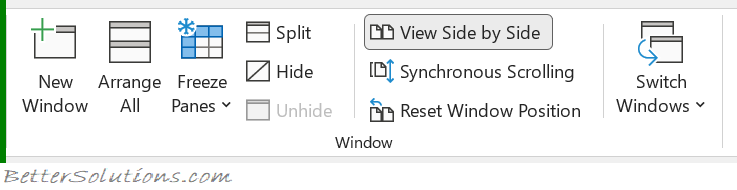
Window
New Window - Creates a new window of your current workbook.
Arrange All - Tile all open windows side by side on the screen.
Freeze Panes - Drop-Down. The drop-down contains the commands: Freeze Panes, Freeze Top Row and Freeze First Column.
Split - Splits the window into multiple resizeable panes which allow you to have multiple views of the same workbook.
Hide - Hides the current workbook or window.
Unhide - Displays the "Unhide" dialog box allowing you to unhide a workbook or window.
View Side by Side - View two workbooks side by side to allow you to compare their contents.
Synchronous Scrolling - Synchronize the scrolling of two windows so they scroll together. The View Side by Side option must be switched on for this command to be enabled.
Reset Window Position - Reset the window position of the two windows being compared so that they share the screen equally. The View Side by Side option must be switched on for this command to be enabled.
Switch Windows - Drop-Down. The drop-down contains a list of all the workbooks/windows that are currently open.
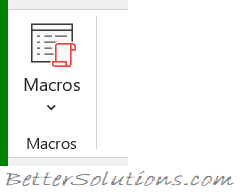
Macros
Macros - Button with Drop-Down. The button is a shortcut to View Macros which displays the "Macro" dialog box displaying all the available macros. The drop-down contains the commands: View Macros, Record Macro and Use Relative References.
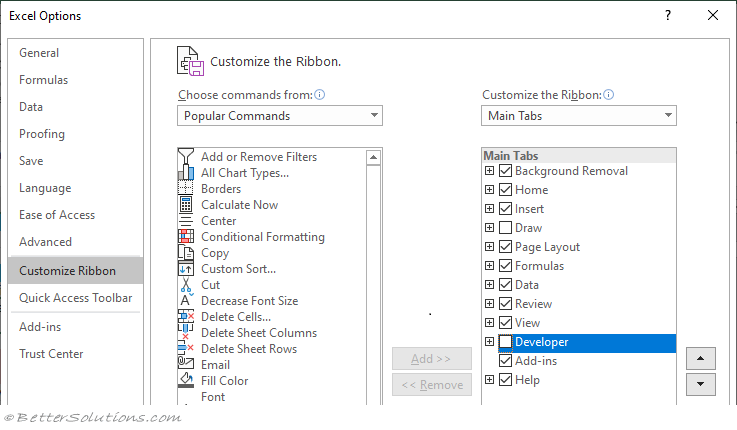
Developer Tab
This tab will not be displayed by default but is very useful when working with macros, add-ins and worksheet controls.
To display this tab select (File > Options) and choose "Customize Ribbon".
All the built-in tabs will be displayed on the right hand side. Find Developer and tick it.
Press OK and the Developer tab will be displayed after the View tab.
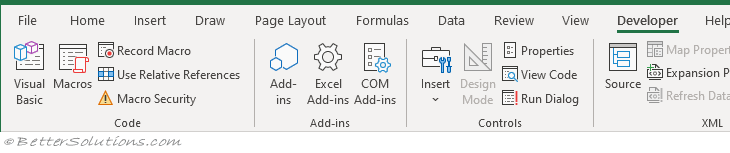
Code
Visual Basic - (Alt + F11). Opens the Visual Basic Editor allowing you to create and edit VBA macros.
Macros - (Alt + F8). Displays the "Macro" dialog box allowing you to run, edit and delete macros.
Record Macro - Records a macro. There is also a shortcut to this in the bottom left of the application window. This changes into "Stop Recording" while a macro is being recorded.
Use Relative References - Toggles the recording of relative references. Using relative references allows you to record actions relative to the initial starting cell.
Macro Security - Displays the Macro Settings tab of the "Trust Center" dialog box.
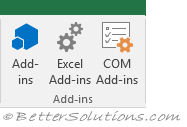
Add-Ins
Add-Ins - (Added in 2016). Displays the "Office Add-Ins" dialog box where you can manage your add-ins and browse the Store.
Excel Add-Ins - Displays the "Add-Ins" dialog box.
COM Add-Ins - Displays the "COM Add-Ins" dialog box.
Controls
Insert - Drop-Down. This drop-down contains the Form Controls and the ActiveX Controls. (Forms toolbar and Control Toolbox Toolbar).
Design Mode - Toggles between Design mode and Run mode, allowing you to resize and edit controls.
Properties - Displays the "Properties" window from the Visual Basic Editor.
View Code - Opens the
Visual Basic Editor allowing you to see the code behind a macro or control.
Run Dialog - (Redundant). Displays the dialog box when an
MS Excel 5.0 Dialog is the active worksheet.
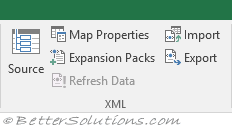
XML
Source - Opens the XML Source Task Pane allowing you to manage XML Maps.
Map Properties - Lets you view or modify XML Map properties.
Expansion Packs - Displays the "XML Expansion Packs" dialog box letting you attach an expansion pack to a workbook.
Refresh Data - Refresh the XML Data in the workbook.
Import - Displays the "Import XML" dialog box allowing you to insert the contents of an XML file onto a worksheet.
Export - Lets you export data to an XML file. Your workbook must have an exportable XML map attached/associated with it.
Modify
In Excel 2016 this whole group was removed.
Document Panel - (Removed in 2016). Displays the "Document Information Panel" dialog box. Lets you use InfoPath templates that work across the whole of Office, including SharePoint.
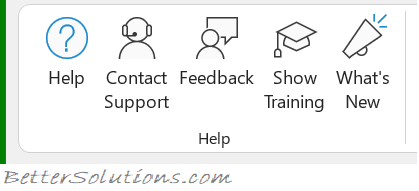
Help Tab
This built-in tab was added in Excel 2019 and provides quick access to the Help Task Pane and some useful website links.
Help & Support
Help - Displays the Help task pane displaying the home page. This can also be displayed by pressing F1.
Contact Support - Displays the Help task pane allowing you to request help.
Feedback - Displays the Feedback tab from the File tab.
Show Training - Displays the Help task pane. This displays training videos.
What's New - Displays the What's New task pane. See the most recently installed updates. This can also be accessed from the File tab, Account.
Community
Community - Opens a browser displays the Excel home page.
Excel Blog - Opens a browser displaying the Excel blog.
History
This tab was first introduced as an optional Excel 2007 Add-in which was then removed in Excel 2010.
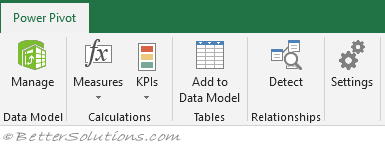
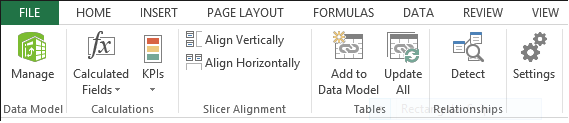
Power Pivot
The PowerPivot add-in is a data analysis tool which provides an extension to
Pivot Tables.
This add-in allows you to work with more than 1,048,576 rows and can work on data from multiple sources.
Fast manipulation of large data sets, streamlined integration of data and the ability to share analysis through SharePoint.
www.microsoft.com/en-us/download/details.aspx?id=29074
If the "Microsoft Power Pivot for Excel" COM Add-in and the "Microsoft Power View for Excel" COM Add-in are both ticked pressing the Manage command will display the Power Pivot for Excel window.
If the "Microsoft Power Pivot for Excel" COM Add-in is not ticked then pressing the Manage command will display a prompt saying "Enable the Data Analysis add-ins to use this feature". Pressing Enable will effectively do the same as manually ticking these add-ins in the COM Add-ins dialog box.
Not Available To Everyone
This add-in is only installed (by default) for the following Microsoft 365 subscriptions:
Microsoft 365
Excel 2021 standalone
Excel 2019 standalone
Excel 2016 standalone
Excel 2013 standalone
Excel 2010 standalone (not installed by default, must be downloaded separately)
Power BI
This term is a very general and very loose term.
It refers to the ability to connect to on-premise and/or cloud sources and incorporates SharePoint Online.
This encompasses both Power Pivot and Power Query.
More Powerful that Pivot Tables
This extend the capability of the PivotTable functionality with new features such as
Expanded data capacity
Advanced calculations
Import data from multiple sources
Publish workbooks as interactive web applications
Use the Data Analysis Expression (DAX) language to create advanced formulas
A powerpivot data model can be used to create a pivottable.
PowerPivot provides a "self-service" approach by allowing users to easily connect to different data sources to analyse data.
PowerPivot does not replace SQL Server Analysis Services (SSAS).
There is also a Power Pivot window and a Power Pivot Field.


Comments