
M.S EXCEL Selecting


Selecting
Selecting a single cell
Before you can make any changes to a cell you must select it first.
You can select any cell by simple clicking on it with the mouse or alternatively using the arrow keys.
Every worksheet always has a cell selected and this cell is always surrounded by a thick black border.
The currently selected cell on a worksheet is referred to as the "Active" cell and there can only ever be one active cell per worksheet.
The cell that is currently selected appears in the "Name Box" to the left of the formula bar.
In the case below, the cell "B2" is selected and the address "B2" appears in the Name Box.
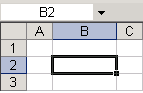 |
The column heading and the row heading for the selected cell are also shaded to help you identify it. This also applies to blocks of cells and non adjacent blocks of cells.
Selecting a block of cells
Using the mouse to select cells is convenient. You can select a range of cells by holding down the left mouse button and dragging the mouse over the cells.
Alternatively you can select cells by holding down the Shift key and using the Arrow keys.
Large ranges of cells can also be selected using a combination of the mouse and the Shift key.
Select the first cell using the mouse and while holding down the Shift key select another cell using the mouse.
Be careful not to select the edge of a cell as you may accidentally move the cell as opposed to selecting it. You will notice that the cursor changes when you are over the border of a cell.
Select cell "B2", and while holding down the Shift key select the cell "D4".
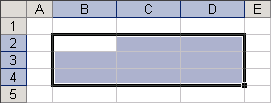 |
If a block of cells is selected then the active cell is displayed as white (in this case cell "B2" is the active cell).
You can also use a combination of the (F8) key and the arrow keys to select cells.
Select the first cell and press (F8). You should see the letters "EXT" appear in the status bar.
This switches what is called "Selection Mode" on. This allows you to use the arrow keys to select your range of cells.
Once the block of cells is selected you can press F8 to turn selection mode off.
Selecting non adjacent blocks of cells
You can select non contiguous cells by holding down the Ctrl key as you select, with the mouse.
Select cell "B2", and while holding hold the Ctrl key, select the cells "D2", "D4" and "B4".
 |
This operation can be done using the keyboard and involves using the shortcut key (Shift + F8) to toggle Add mode on or off.
For more information about Add mode and Extended mode, refer to the Status Bar page.
Selecting a row
Every row is identified by a number and selecting the row number selects the whole row.
When a row is selected the cells in that row are selected (all 256 of them).
You can either drag the mouse over several row headings, or use a combination of the Shift and Ctrl keys to select adjacent or non adjacent rows.
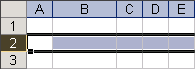 |
When a row is selected the first visible cell in that row becomes the active cell.
A quick way to select the row containing the active cell is to press (Shift + Spacebar).
Selecting a column
Every column is identified by a letter and selecting the column heading selects the whole column.
When a column is selected all the cells in that column are selected (all 65,536 of them).
You can select a group of columns in a similar way to selecting a group of cells.
You can either drag the mouse over several column headings, or use a combination of the Shift and Ctrl keys to select adjacent or non adjacent columns.
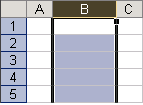 |
When a column is selected the first visible cell in that column becomes the active cell.
A quick way to select the column containing the active cell is to press (Ctrl + Spacebar).
Selecting a whole worksheet
You can select the whole worksheet (i.e. all the cells) by pressing (Ctrl + A) or (Ctrl + Shift + Spacebar).
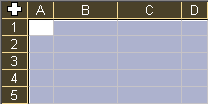
Alternatively you can press the "select all box" located in the top left hand corner of the worksheet. This is where the row and column headings intersect.
 |
Selecting a region
By pressing (Ctrl + Shift + Arrow Key) you can quickly select a horizontal or vertical block of cells.
If you select the top left cell of a block of data, pressing (Ctrl + Shift + Right Arrow) followed by (Ctrl + Shift + Down Arrow) will allow you to quickly select the whole region.
This is the same as pressing (Ctrl + Shift + 8). The advantage of using this shortcut key is that it selects the current region when any cell in the block is selected.
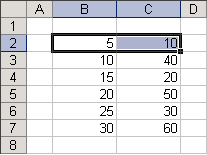
Select the top row or cells at the top of your table, in this case "B2:C2".
 |
Hold down the Shift key as you double click the bottom side of an active cells border.
All the cells from the current selection to the next region will be selected, in this case "B2:C7".
 |
The cell that was initially selected remains the active cell.
Selecting Cells
You can use the F8 key to select a cell range. Select the top-left cell, press F8. Click the bottom-right cell. Press F8 again to cancel the highlighting.
The (Edit > GoTo)(Special dialog box) has numerous different options for selecting cells of a particular type, including: All, Formulas, Values, Formats, Comments, Validation. All except borders, None, Add, Subtract, Multiple, Divide, Skip blanks, Transpose, Paste Link.
If you are deleting cells or modifying cells on a worksheet it is always a good idea to switch the calculation to manual first.
Selecting Cells - Visible Only
When you've filtered data or hidden rows or columns, selecting a block of cells will also, disappointingly, select the cells that are not visible. There is a hidden command that will let you select only the visible cells. It's hidden in that you have to add this command to your toolbar in order to use it.
Right-click in the gray area of the toolbar to the right of Help
Choose Customize
Go to the Commands tab
Choose the Edit category
Scroll all the way to the bottom of the list of Edit Commands
You should find the Select Visible Cells command
Click and drag this command and drop it where you want it to appear on a toolbar.
Now anytime you have cells hidden, you can click the Select Visible Cells icon to select all the currently visible cells WITHOUT selecting those cells you can't see.
Important
A group of adjacent cells is often referred to as a "range" of cells.
If you want to select a really large range of cells then it may be easier to reduce the Zoom percentage first.
If you cannot see the active cell because you have scrolled to a different part of the worksheet, you can press (Ctrl + Backspace) to return to the active cell.
It is possible to change the active cell in a selected range without changing the whole selection by using the Enter key to manoeuvre within the selection.
GoTo
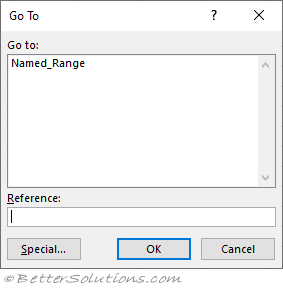
When you select (Edit > GoTo) all the named ranges are displayed in alphabetical order.
This dialog box can provide a very quick way to move around a workbook as selecting named range will take you directly to that cell or range of cells.
The GoTo dialog box remembers the last four cells or ranges of cells you visited. Your previous cell range will automatically appear in the Reference box when the dialog box is displayed.
You can also use either of the shortcut keys F5 or (Ctrl + G) to display the (Edit > GoTo) dialog box.
You can very quickly jump between two parts of a worksheet by pressing F5 and Enter.
You can quickly move to and select a cell or a range of cells by using (Edit > GoTo). You can also use the GoTo feature to extend a selection, just hold down the Shift key when you press Enter.
This will display a list of all named ranges, bookmarks etc
You must save the workbook to reset the last cell or call Activesheet.UsedRange.
Also activated by pressing F5 has a number of useful options including the last cell in a worksheet that contains numbers.
 |
The (Edit > GoTo) special allows you to select a number of cells in the active sheet simultaneously. Select any a single cell in the active sheet and the entire worksheet is searched. Select a range (i.e. more than more cell) and only that range is searched for matching cells
Special
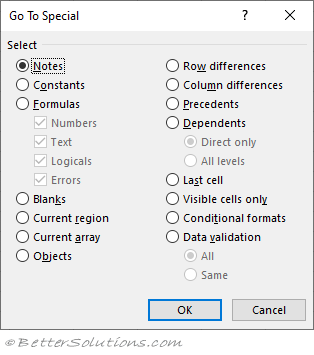 |
Comments - Cells that contain comments.
Constants - Cells that contain constant data (text, numbers or dates) as opposed to formula. Select or clear the numbers, text, formula check boxes to specify whether to include them in the search.
Formulas - Cells that contain formulas (i.e. start with an equal sign "=") rather than constant values. Select or clear the numbers, text, logical and errors check boxes to specify whether to include them in the search.
Blanks - Cells that contain no data or formatting. Excel automatically ignores every cell below and to the right of the last cell in a worksheet that contains data.
Current Region - The active cell and all cells surrounding it up to the first blank row and column in all directions.
Current Array - select a cell with an array-entered formula. The entire range of cells containing the array formula is highlighted.
Objects - Any objects on the worksheet including charts, text boxes, autoshapes.
Row Differences - Selects cells whose contents are different from the comparison cell in each row. For each row, the comparison cell is in the same column as the active cell. Cells within the selected range whose contents are different from the contents of the comparison cells you specify. Select the range of cells to evaluate, click a cell in the comparison column to make it active, then select this option button on the dialog box.
Column Differences -
Precedents - Cells to which the active cell refers. Select the Direct Only option (default) to select only direct references or the All Levels option to include indirect references as well.
Dependents - Cells refer to the active cell. Select the Direct Only option (default) to select only direct references or the All Levels option to include indirect references as well.
Last Cell - The last "used" cell on the active worksheet and does include formatting. This cell is updated, you don't need to close the workbook is closed.
Visible Cells Only - Only cells which are visible as opposed to hidden. This option can be useful when you want to copy just the filtered rows from a table of data. Select the range, display the dialog, select this option and then copy the data.
Conditional Formats - Cells that have had any conditional formatting applied to them. Select the All (default) option to select all cells or the Same option to select only cells which have the same conditional formatting as the active cell.
Data Validation - Any cells that contain any data validation rules. Select the All (default) option to select all cells or the Same option to select only cells which have the same data validation as the active cell.
Important
You cannot use the (Edit > GoTo) dialog box to move between workbooks.
Undo Repeat
This feature is extremely useful and can be used to undo changes made to any open workbook.
It is not workbook or worksheet specific.
The Undo and Redo buttons on the standard toolbar allow you to quickly correct mistakes without repeating the steps again.
Both these buttons include drop-down lists to allow you to perform multiple undos and redos.
It is possible to undo and redo up to the last 16 consecutive actions.
Every time you use the Undo feature, those actions that you undo are placed in the Redo category.
After a workbook has been saved it is not possible to undo any actions performed in that workbook.
Using Undo
Whenever you make mistakes you can quickly undo a single action by selecting (Edit > Undo).
This can only be used to undo single actions at a time.
You can repeat the undo by using the shortcut key (Ctrl + Z).
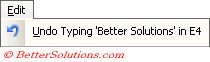 |
You can also use the Undo button on the standard toolbar.
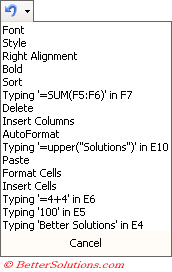
The black arrow on its right gives you access to the actions that were last undertaken.
You can quickly undo multiple action by dragging the mouse over the list and selecting which actions you want to undo.
 |
Using Redo
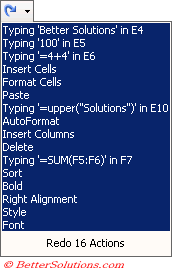
You can either use the (Edit > Redo) to redo single actions or use the Redo button on the standard toolbar.
The Redo is structured exactly the same as the Undo except that a Redo action cancels the Undo action.
When you undo a number of actions, these actions are transferred to the Redo list.
If you then redo these actions they are transferred back to the Undo list.
 |
Using Repeat
It is possible to repeat your last action (assuming that it was not an Undo).
You can also repeat your last action by using the shortcut key (F4) or (Ctrl + Y).
Things you cannot Undo
Some actions especially those involving worksheet manipulation cannot be undone (such as inserting or deleting of worksheets).
Any actions that you cannot undo will not appear on the drop-down list.
You also cannot undo settings from the (Tools > Options) dialog box, saving or printing.
Increasing the Undo Limit
It is possible to change the registry entry if you want to be able to undo more than 16 actions.
There is no option to change the maximum number of undos.
Although in PowerPoint it is possible (Tools > Options)(Edit tab, "Maximum number of undo").
Important
The (Edit > Undo) command is not workbook nor worksheet specific so it is possible to undo the changes made to any open workbook.
Comments