How to Remove Background of an Image Using Photoshop
How to Remove Background of an Image Using Photoshop
The background is the entire canvas of an image. It is behind the main object, which may be a person, place, or any object. When it comes to photo editing, removing the background is one of the most demanding and challenging tasks.
Photoshop provides several tools that automatically select the main object of the image by estimating their color pixels. We can extract this from the background or remove the background.
Removing the background is a straightforward process. We can perform this task using different tools.
In this section, we will discuss some quick and efficient techniques to remove the background from the image.
Before removing the background, ensure the following points, which will help you choose the best way to extract the main object from the image clearly.
The subject should be clearly extracted from the background: Sometimes, our subject does not clearly extract from the background due to similar color pixels in the main object and background. In such a case, we should choose a tool wisely. For example, we need to extract an image of a person wearing a green coat standing in front of a tree. In this case, the Photoshop AI tool might be confused to differentiate between the subject and background.
Subject Edges should be sharp: In few cases, the edges of the subject are not clearly sharp. So it may be complicated to precisely extract the main subject from the background. For example, an image of a man with curly hair. In such a case, it will be hard to Photoshop AI tools to precisely select the hairs.
The background should not have unclear borders: In few cases, the image background object may have unclear borders such as water, fire, sky, etc. It is also hard for Photoshop AI tools to select similar color pixels at once in such cases.
So it is recommended to choose a tool according to your specifications. Here, we are going to discuss different ways to remove the image background in Photoshop.
Let's discuss effective ways to remove the background of an image:
Remove Background of an Image using Magic Wand Tool
The magic wand tool is one of the oldest tools to select similar color pixels effectively. As its name suggests, it magically selects all the similar color pixels of an image. Unlike other tools, it selects pixels according to tone and color. Comparatively, other tools are based on the shape or object edges. But sometimes, it becomes complicated to control that which pixels the tool selects. Overall it is the easiest way to remove the background using the magic wand tool. So if it clearly selects the objects, then it is good to use the magic wand tool.
Follow the below steps to extract the background from the image using the magic wand tool:
Step1: Open an Image
The first step is to open an image. To open an image, press the Ctrl + O keys and select the image from the file menu.
Step2: Extract the Background Layer
Now, the next step is to extract the background layer by double-clicking on it.
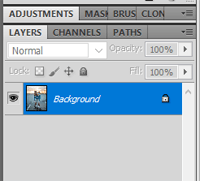
It will ask you to create a new layer, provide the name of the layer, and hit enter to extract the background layer.
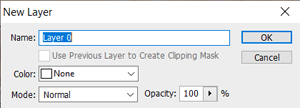
Now, the background layer is extracted from the objects.
Step3: Select the Magic Wand Tool
Now, select the magic wand tool to select the object to be extracted from the background. To select the magic wand tool, press the W key or select it from the toolbar given at the left of the screen.
Now, start selecting the main object by pressing the Shift-drag key. It is recommended to zoom the image to precisely select similar color pixels.
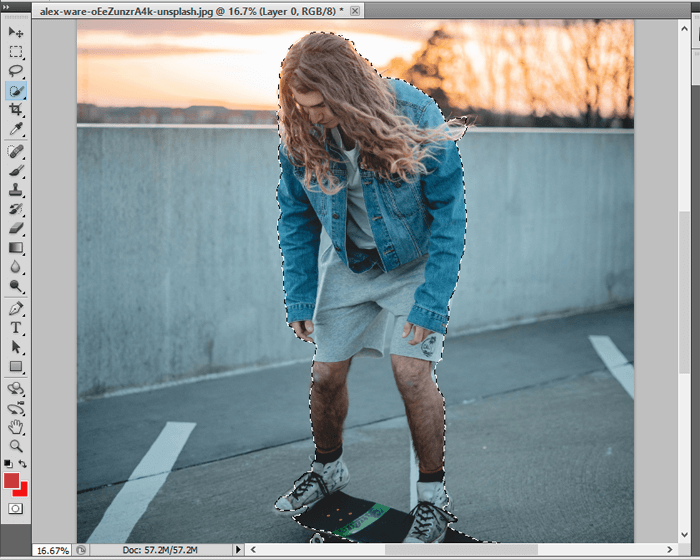
We have selected the main subject; we can do different things either we can make an invert selection and delete it by pressing the Delete key, or we can cut or copy this selection and paste it to a new layer. We will paste it into a new layer.
Step4: Copy the selection to a new layer
Now, cut or copy this selection from here and paste it to a new layer. To create a new layer, press the Ctrl + Shift + N keys.
Now, paste the selection on it. The magic wand may select some region of the image that we don't want to include in our main object. So again, on this layer, we can reuse the magic wand tool.
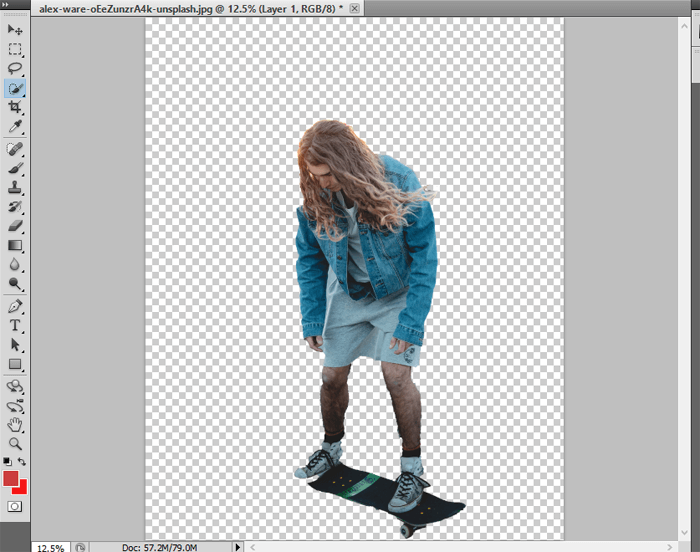
Here, we have precisely extracted the background from the image. Now, we can add a new background or fill the background color to it.
Remove Background of an Image Using Magic Eraser Tool
The magic eraser tool selects similar color pixels and deletes them. If we are working on a locked layer, it will change the image's background color; otherwise, it deletes the pixels and makes them transparent.
Let's understand how to remove the background using the magic eraser tool:
Follow the below steps:
Step1: Open an Image
To open an image, press the Ctrl + O keys and select the image from the file explorer.
Step2: Extract the Background Layer
To extract the background of the image, double click on the image layer and extract the background into a new layer.
Step3: Select the Magic Eraser Tool
The Magic eraser tool can be selected by pressing the E key. We can also select it from the toolbox available at the left of the workspace. It will instantly activate the magic eraser tool. Now, we can easily remove the pixel using this tool.
Step4: Paint over the unwanted part of the image
The magic eraser works like a brush tool. The only difference is that it will remove the pixels instead of painting that. However, if our layer is locked, then it will paint the pixels with the active background color. So if you want to remove the pixels, make sure to unlock the layer (Step2).
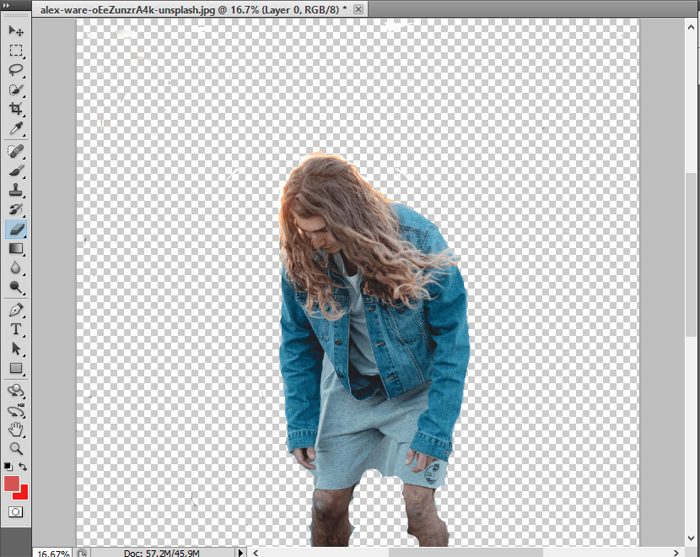
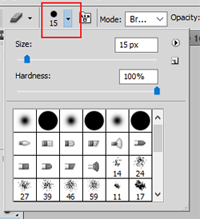
Now, we can remove the background using the magic eraser tool. It is recommended to zoom the image while removing the pixels. Also, keep the brush size minimum while painting around the main object. You can adjust the brush size by clicking on the brush size icon from the topbar given just above the work area.
Remove Background of an Image using Quick Selection Tool
An object selection tool is an excellent tool for selecting a similar region in the image. It is useful for selecting the specific object in an image, such as car, people, furniture, clothes, and more. We can select the object by creating a rectangular region around the object.
It automatically selects the object inside the specified region. It works better on well-defined objects having regions without contrast.
The Object selection tool can be activated using the following two ways:
- From the tools panel given at the left to the workspace.
- From the select and mask option in the tool panel given at the top menu
Let's understand how to remove the background using the quick selection tool:
Follow the below steps to remove the background using the quick selection tool:
Step1: Open the Image
Step2: Extract Background Layer from the Image
Step3: Select the Quick Selection Tool
To select the quick selection tool, press the W key or select it from the tools panel given at the left to the workspace. Both the magic wand tool and quick selection tool belongs to the same category.
Step4: Select the Background
Select the background using the shift-drag. It will automatically select the regions having similar color pixels.
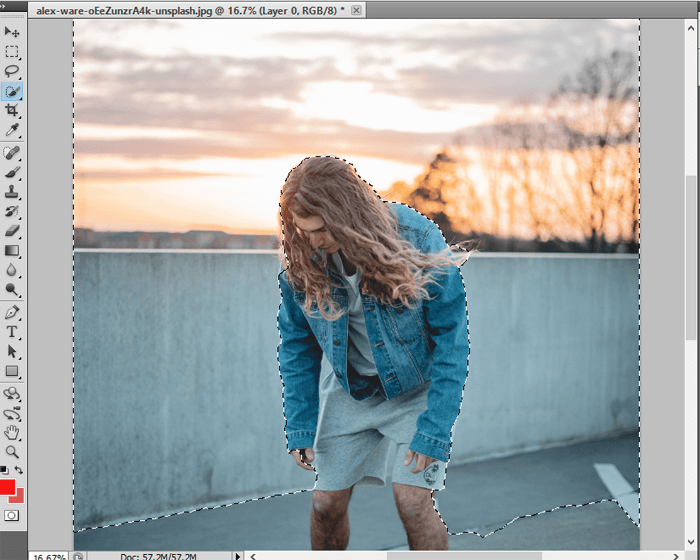
Now, it will select the specified region. It is recommended to zoom the image to precisely select the background.
Step5: Delete Background
Press the Delete key to remove the selected region from the image. It will remove the background from the image.
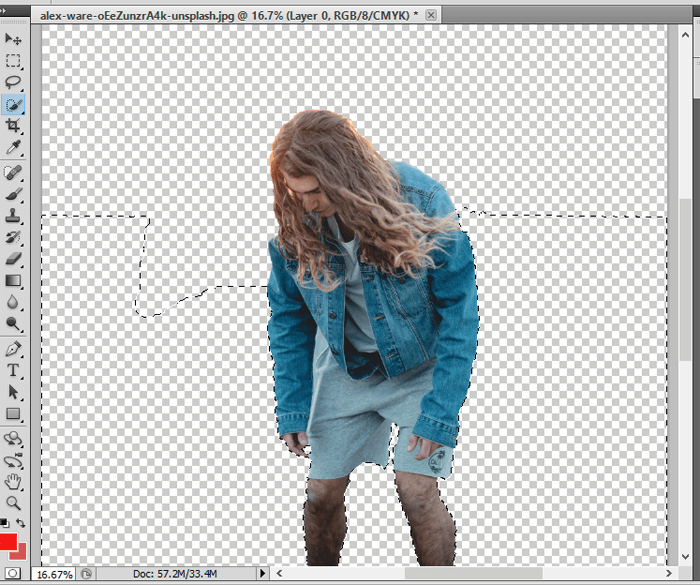
Here, we have removed the background of the image using the quick selection tool. Now, we can add a new background to this image by using an image or filling background color to it.
Conclusion:
We have discussed three different tools to remove the background from an image using Photoshop. Apart from these tools, we can choose other selection tools to do so entirely depending on your need. People also use the pen tool to precisely select the main object. The pen tool is one of the finest tools to make a proper selection. However, it will take some time to be perfect in the pen tool. But, once you get familiar with the pen tool, it will be pretty useful than any other tool.

.jpg)

.jpg)
Comments