CorelDRAW: Exporting and importing files
CorelDRAW: Exporting and importing files
Our application facilitates filters that transform files from a single format to other formats if we export or import files.
This chapter includes the following essential topics:
- Exporting files
- Importing files
Importing files
We can import many files created inside some other applications. We can import the Adobe PDF (Portable Document Formats), AI (Adobe Illustrator), or JPEG. We can import any file and also place it within an application window (active) as the object. We can center and resize any file as we import. This imported file becomes an active file's part. We can also import the bitmaps as the linked images (externally). If we import the linked bitmaps, various edits to the external (original) file are updated inside that imported file automatically.
We can apply settings in the code page if we have imported any file from the old version to ensure that notes, keywords, and object names saved with a file are shown accurately.
To import the file into the active drawing
1. Press File > Import.
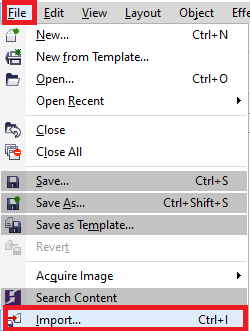
2. Select any folder in which the file has been stored.
3. Select the file format through a list box near to the box of the File name.
If we do not know any format of the file, select All file formats.
4. Press on the file name.
5. Press on the Import button, and implement form the below tasks:

- Press the drawing page for maintaining the file's position and dimensions its top-left section where we press.
- Click Enter in the file's center over the drawing page.
- Drag over the drawing page for resizing the file.
- Click the Spacebar for placing a file in that similar position as this file was in AI and CDR (original) file.
To import the bitmaps as the linked image (externally)
1. Press File > Import.
2. Select any folder in which the image has been stored.
3. Select the file format through a list box near to the box of the File name.
If we do not know any format of the file, select All file formats.
4. Press on the file name.
5. Press on the arrow near to the button, i.e., Import, and then press Resample and load.
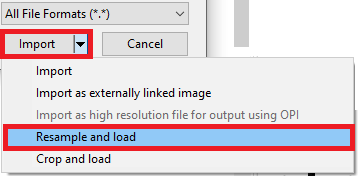
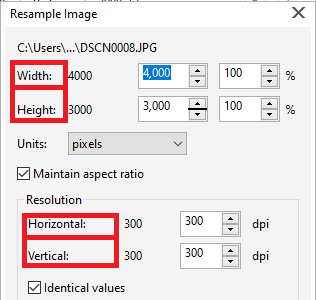
6. Type the values inside the below boxes within the dialog box of Resample image:
- Height: It describes the graphic's height in a select measurement unit or as its original height's percentage.
- Width: It describes the graphic's width in a select measurement unit or as its original width's percentage.
7. Type the values inside the below boxes within the area of the Resolution:
- Vertical: It enables us to describe the graphic's vertical resolution in dots or pixels per inch.
- Horizontal: It enables us to describe the graphic's horizontal resolution in dots or pixels per inch.
8. Press on the drawing page.
Exporting files
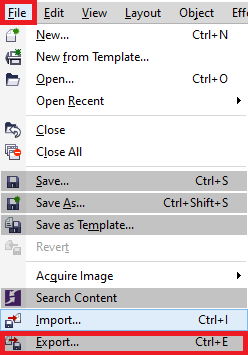
We can apply a command, i.e., File > Export, for exporting files into the vector file formats and bitmaps variety that could be applied in some other applications.
To export the files
1. Press File > Export.
2. Select any folder where we wish to store the file.
3. Select any file format through the list box of the Save as type.
4. Type the values inside the list box of the File name.
5. Select any checkbox from the below:
- Export this page only: It exports the latest page within the multipage file only.
- Selected only: It saves many objects to select within an active drawing only.
- Do not show filter dialog: It suppresses the dialog boxes which facilitate more advanced options for exporting.
Note: Above options aren't available for every file format.
6. Click Export.
To save the file into ant different format
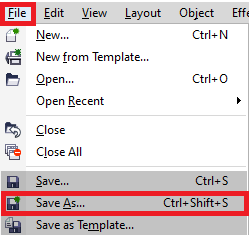
1. Press File > Save as.
2. Select any folder where we wish to store the file.
3. Select any file format through the list box of the Save as type.
Type the values inside the list box of the File name.
5. Select any checkbox from the below:
- Selected only: It saves the objects chosen within an active drawing only.
- Save with embedded VBA project: It allows us to save, macros, with any file we have made inside the VBA editor.
6. Click Save.


Comments