Layers in Photoshop
Layers in Photoshop
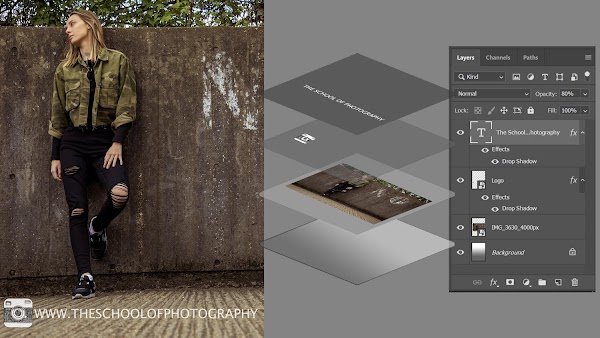
Layers are one of the finest tools of Photoshop. They are like a separate sheet of paper arranged in a sequence to create an exceptional image. We can see through transparent areas of the layers to layer down. We can also move layers to set the image content. We can move a layer up or down to position an element on the image. Moving a layer is a straightforward process, just like sliding a sheet of acetate in a stack. We can also specify the opacity of the layer to make the layer's content partially transparent or completely transparent.
Using Layers, we can perform tasks like the composition of multiple images, adding text to an image, adding shapes, and more. We can also apply a layer style to provide a special effect such as glow or drop shadow to a layer. We can add or delete a layer at any moment while working. It is quite easy to manage Layers and work with them.
The layer is an essential feature of Photoshop; we cannot assume to create something creative without using Layers. By default, the Essentials workspace of Photoshop contains a layers panel, where all the layers can be seen and managed. If it is not available, then it can be displayed by navigating the Window-> Layers menu or by hitting the f7 key.
In this section, we will discuss how to use and manage layers in images. Further, we will see how to add, remove, or style layers in Photoshop.
Why Layers are necessary for work
As we have discussed, Layers are essential for creating a stylish image or any other graphical work. It is not easy to work with every component of an image at once without affecting other parts of the image. In such cases, layers provide us a flexible way to add or edit a specific part of the image and compose them in another image. Layers provide an amazing way to control an image. It will take some time to be comfortable with the layers.
Layer Panel
By default, The Layer Panel is available in the essential workspace. But, in case if you have lost it, then it can be reactivated using the f7 key in the keyboard. Using the layers panel, we will manage and adjust the layers.
Below is the snapshot of the layers panels.
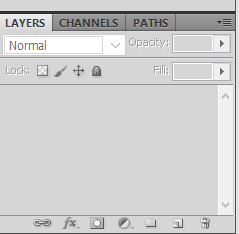
Components of the Layer Panel
In Photoshop Layers, there are several components. Let's understand all the components and different types of Layers:
Thumbnail: A thumbnail is a small picture having the content of the layer. It can be seen on the layer.
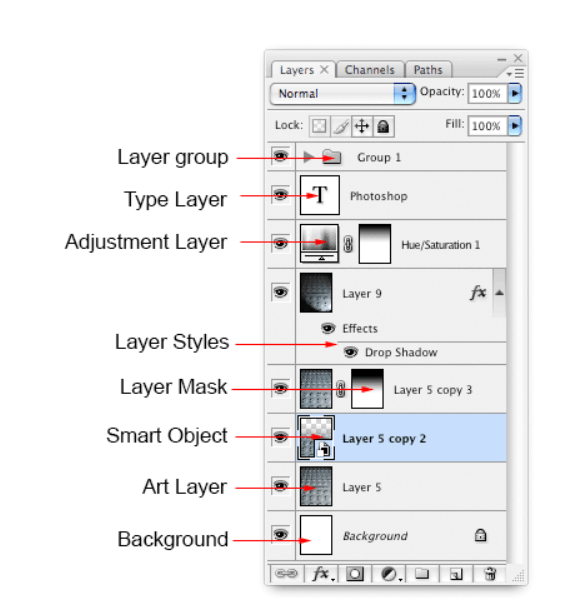
Layer Group: Layers can be grouped by placing them into a folder. A layer group is a folder that has multiple layers.
Type Layer: The Type layer is a layer that can be edited, such as the text layer. It is similar to the Image layer.
Adjustment Layer: The adjustment Layer is a layer having some customizations such as colors or tone of all the layers underneath it. It will only affect the layers underneath it and avoids other layers.
Layer Style: The Layer style is a layer that has some effects. We can click on the eye icon to turn the layer style on or off. The layer style options can be seen by double-clicking on the layer.
Layer Mask: The Layer mask is an essential part of a layer for non-destructive editing. It is used to paint on the mask to show and reveal the image components.
Smart Object: A smart object is a special layer or a container that holds multiple layers, vectors, video, raw files, 3D, etc., types of objects.
Background Layer
The background layer is a default layer in every image which is behind the image content. It is also known as the invisible layer because, by default, it is locked; to work on it, we will need to unlock it. The background layer is useful to make an image transparent or change the background of an image. While creating an image, we can also choose a transparent background; it will add a transparent background layer.
Let's understand how to work on a background layer.
First, we need to open an image. To open an image, stroke the Ctrl+ O keys and select the image from your local storage. It will open in our workspace.
Now, we can see the image is opened in a default layer.
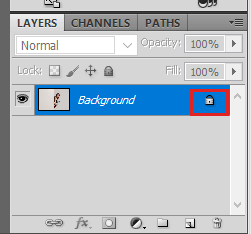
It is a hidden layer. We can double-click on the lock icon to extract it from the image.
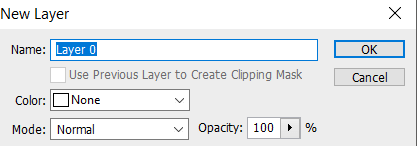
We can name this layer; by default, it will be named as Layer 0. To extract it from the image, click ok. To confirm the extraction, select a layer, drag the image, and move it to a different section. You will notice the image has two layers: the background layer and the other image content layer. To move it, we have to select the move tool; we can select it from the tools panel or by hitting the V key. Consider the below image:
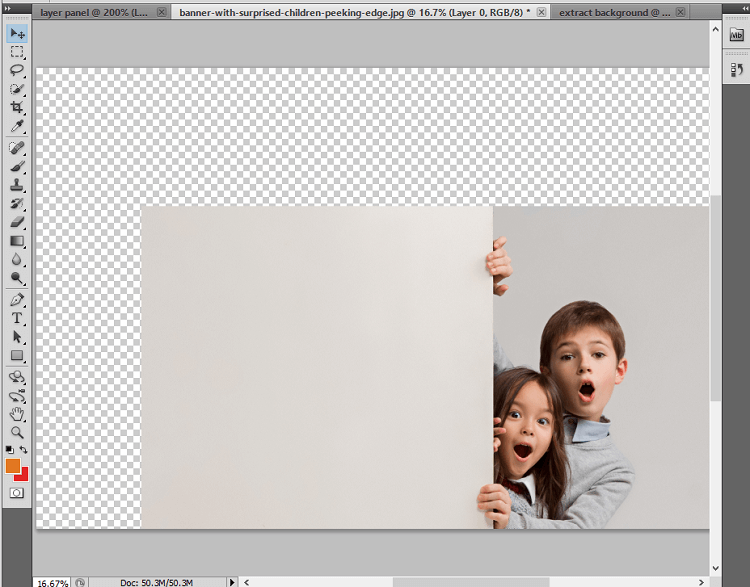
Now, it will be extracted from the image; we can fill any background color in it. First, we need to remove the previous background by using the magic wand or magic eraser tool to change the background of the image. Later, we will discuss these tools in a separate section in detail. Also, we will see how to change the background of an image using layers and these tools.
Note: It is suggested that the background layer be kept locked until you need it; otherwise, it may affect the image during work.
Adding a new Layer
Photoshop is an advanced photo editor; usually, it will create a new layer when we choose a new tool and start something drawing on it.
For example, if we select the text tool and add some text to the image, it will add that text in a new layer. Consider the below image:
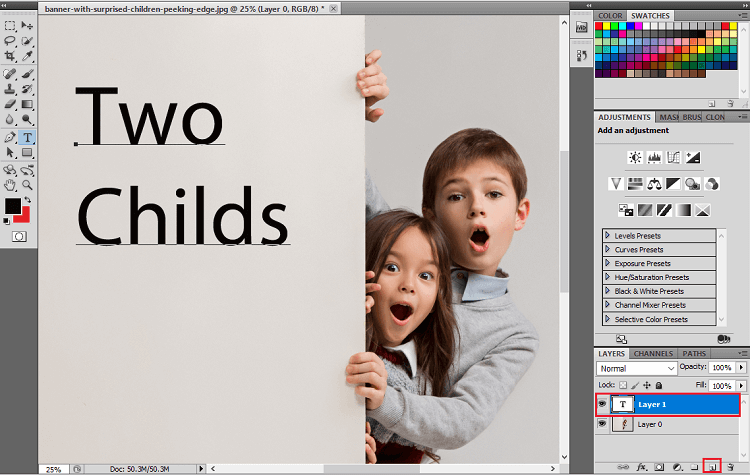
We have added some text; Photoshop has automatically created a new layer and add that text on a new layer named Layer 1. The main benefit of adding text in a new layer is that we can easily manage that text without affecting the image content. We can edit and move the layer if needed.
If we manually want to add a new layer, we can do so by clicking on the new layer icon given at the bottom of the layer panel (Highlighted in the above image) or hitting the Ctrl + Shift + N keys. It will prompt for a new layer, provide a layer name and click Ok to create. We can define the opacity, color, color modes of this layer. Later, in other sections, we will discuss them in detail.
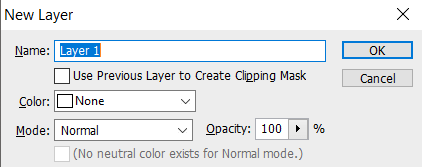
Now, we can add content such as text, images, colors, etc., to this layer.
Deleting a Layer
Deletion of a layer is a straightforward process like adding a new layer. To delete a layer, right-click on a layer and select the delete option or navigate to the layer panel and look for the delete icon at the bottom of the panel.
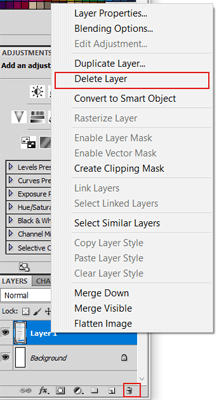
It will ask for the confirmation of deleting the layer; click Yes to continue.
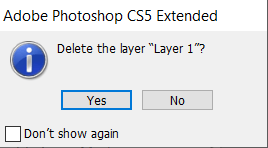
We can also hit the Delete key to delete with confirmation. It will not ask for confirmation. We can select multiple layers by holding the shift key and clicking on the layer.
Anytime you want your layer back, you can undo operations using Ctrl + Alt + Z keys.
Managing Layer
Photoshop allows several manipulations over the layers. We can effectively manage our layer stack. We can perform several operations such as move, transform, reorder, group, etc., on layers.
Reordering Layers
To move a layer up or down, click on the layer and drag it on up or down.
Display the Layer Panel
To display the Photoshop Layer Panel, navigate to the Window-> Layer menu or hit the f7 key.
Choose a Command from Layers Panel
We can see a triangle at the top-right corner of the layer panel. We can choose several commands such as New Layer, Duplicate Layer, Layer group, convert to a smart object, and more from this menu.
Change the Size of the Layer Thumbnail
To change the thumbnail size of the layer, choose the Panel option from the layer menu (triangle at the top-right corner) and select the thumbnail size.
Change the Thumbnail Content
To change the thumbnail content, select the Panel options from the layers panel and select the entire document. Now, select the layer bounds to specify the thumbnail content on the layer.
Duplicate Layers
We can duplicate a layer to perform several adjustments without affecting the original layer.
To duplicate a layer, right-click on the layer and select the duplicate layer option.
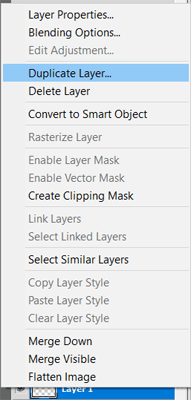
It will ask for confirmation; click Yes to duplicate the layer.
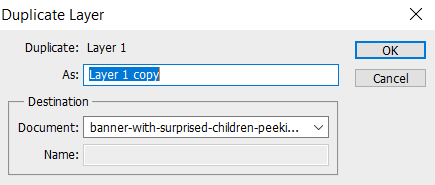
It will create a new copy of the layer having the same content.
Creating a Layer Group
A layer group is a collection of several layers. Groups are useful for organizing the project and keeps the layer's panel uncluttered.
To create a layer group, we can perform any of the following operations:
- Create a new layer group from the layers panel options and select the New Group It will create a new layer group, now drag and drop layers in it.
- Select all the layers that we want to group, open the layers panel options, and select the New Group from Layers It will create a group and place all the selected layers in it.
- Or, perform Alt-drag (Windows) or Option-drag (Mac OS) operations to the layers and move them into the folder icon given at the layer panels' bottom. It will ask to create a new group, confirm the process.
To Ungroup Layers
To ungroup layers, right-click on the layer group and select Ungroup Layers. It will ungroup all the layers from the group and delete the group.
Link Layers
We can link two or more layers or groups. The linking of layers creates a relationship between them, and they will keep the relationship until we unlink them. We can apply or move transformation to linked layers.
To link the layers or groups, select the layers or groups and click on the link icon given at the layer panel's bottom.
To unlink the layers or groups, select the layers or groups and again click on the link icon. It will unlink the layers.
We can temporarily disable the linked layers. To disable them, temporarily shift-click the link icon and do the same to link them again.
Show and Hide Layers
To hide a layer, click on the eye icon available next to the desired layers. And to display the layer, click again on this icon.



Comments