How to Change Color in Photoshop
.jpg)
How to Change Color in Photoshop
Photoshop is an efficient tool for adjusting the colors of an image. It is a leading photo manipulation tool. Colors are an integral part of the image, which completely defines the view of the image or object.
Sometimes, while working with images, several images may not have the color pattern that you want to have. No matter what colors you have in your graphics, we can change them in any pattern using Photoshop.
We can add critical visuals to our image by changing the colors of the objects in an image. Photoshop provides several tools such as Hue Saturation, Blending Modes, Color Replacement tool, etc., to deal with colors.
Also, changing the background color is one of the most used and demanding tasks for graphic designers, photographers, and other professionals. Changing colors are completely dependent on the original colors of the image. So, choose a way that meets your imagination.
In this section, we will discuss different ways of changing the color of an object in Photoshop. All these methods are very capable and efficient in changing the view of any image. You can apply any of the following mentioned methods to change the image's color; also, you can combine any two methods to mix the colors. We'll be using different layers for applying effects so that at any moment, we can go back and make changes.
We will discuss the following methods:
- Change Object Color Using Hue/Saturation
- Change Object Color by Adding a Color Layer
- Change Object Color Using the Color Replacement Tool
- Change Object Color Using the Layer Style
- Change the Background Color Using Photoshop
Change Object Color Using Hue/Saturation
The Hue/ Saturation tools allow us to adjust the colors of the image. The Hue is meant for the color, and saturation is for the purity. It is one of the finest tools to colorize an image in Photoshop quickly. It also provides an option to control the brightness of the image. One of the best things about this tool is that it is very easy to use. We can play with colors by sliding the hue and saturation slider.
To apply the hue saturation effect to the image. Open the image by pressing the Ctrl+O key combination. Now, select the Hue saturation tool by navigating to the image-> Adjustments-> Hue/Saturation menu or press the Ctrl+U key combination.
Now, the Hue/Saturation window will be opened as follows:
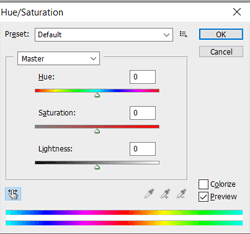
Now, drag the Hue/ Saturation sliders to adjust the colors. The changes on the image will be live, which means we can see a preview of the changes. Also, we can adjust the brightness of the image by sliding the Lightness slider.
Consider the below image:

In the above image, the first image is the original image and the second image is after the Hue/Saturation effect. Here, we can see that the colors of the image are manipulated by just changing the Hue/Saturation value.
Change Object Color by Adding a Color Layer
The Color layer is a great alternative to the Hue/Saturation tool. It is useful to fill the specific color that may not be found in the Hue/Saturation tool. However, it is not as straightforward as Hue/Saturation tool, but it can be used in two easy steps.
To create a new color layer, navigate to Layer-> New Fill Layer-> Solid Color. It will open a popup menu for creating a new layer click ok to continue:

Now, it will open a color picker choose the required color that you want to fill in the image. We can also choose the gradient or pattern fill option instead of the solid color.
Now, our color layer is created, but to apply this layer in the image, we have to switch the blending mode from normal to color. Thus the color effect will be applied to the image by using the color layer.
Consider the below image:

As we can see from the above image, the applied color effect is similar to the Hue/Saturation tool.
One great thing about the color layer is that it automatically creates a layer mask for the layer. We can click on this mask and paint the areas that we don't want to colorize. Also, at any moment of the editing, we can easily change the color of the layer.
Change Object Color Using the Color Replacement Tool
The color replacement tool is also a fantastic tool to colorize a picture with realistic colors. But, it is a kind of brush tool, so we have to paint over the region to change the color of the specific region.
The color replacement tool can be found under the brush tool section in the toolbar. We can activate this by pressing the B key.

It works like a brush tool. Just drag the brush to the region where you want to change the color. By default, it uses the active foreground color to paint.
Consider the below image:
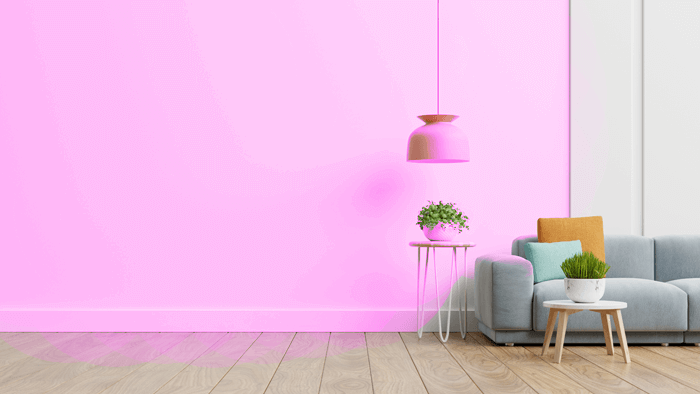
We can see we have painted half of the image using the color replacement tool from the above image.
Change Object Color Using the Layer Style
We can also change the image's color using the layer style options. It is useful for changing any icons color. We cannot change a specific region's color using this method. It will entirely change the image's color. It may cover our images canvas, so it is useful only for png images.
First, to change the color using layer style, unlock the background layer by double-clicking on the image layer, then right-click on the image layer and select Blending Options. Here, we can find different options for styling our layer, choose the color overlay, then click on the color box to select the desired color. Click Ok to apply it.
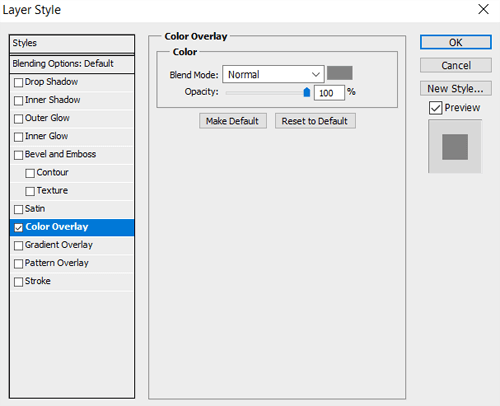
Using the above method, we can change any image's color.
Change Object Color Using Quick Selection Tool or Magic Wand Tool
The Quick selection tool or magic wand tool is one of the finest tools in Photoshop to choose a similar color region automatically. So using these tools, we can precisely select an object and change the color. To activate the quick selection tool, press the W key or select it from the toolbox given at the left of the workspace. Both tools are available in the same tool category; hold this in the toolbox to select any one of them.
Now, precisely select the image region for which you want to change the color after making a selection, press Ctrl+J key combination to cut it into a new layer.
Now, our selection is moved into a new layer; we can change the color of this selection using any of the methods like blending options or gradient. Select any color style and apply it.
Consider the below image:
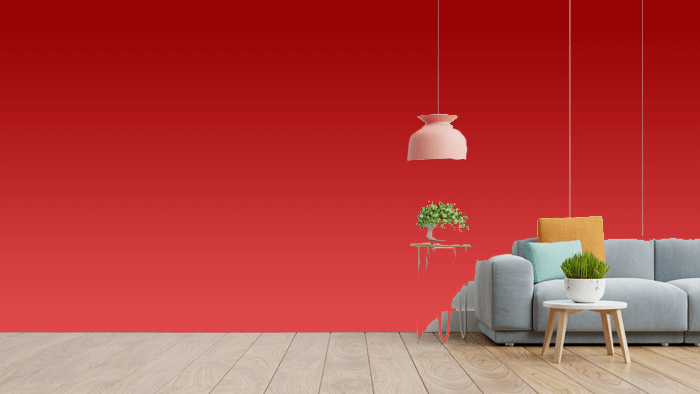
In the above image, we have applied a gradient overlay. To apply any color or gradient, right-click on the layer and select the blending options. Here, we can find different layer style options. We can choose any of the styles as per our need.
Change the Background Color Using Photoshop
We can easily change the background color of an image using Photoshop. Changing background color is not a piece of cake, but we can make it easy by using multiple tools in Photoshop. The first thing to change the background color is selecting the background precisely because the image may contain blurry background, inexplicit colors, or multiple colors.
To select similar color pixels, activate the magic wand tool or quick selection tool and start selecting the background by pressing the Shift-drag keys. After selecting the color, pixels press the Ctrl+J keys. It will cut the selection to a new layer. In this layer, apply the layer style and change the color of this layer. But, there may be a chance that we have missed some pixels or copy some extra pixels for that use the brush, heal, or clone stamp tool to fix the damaged pixels.
Consider the below image:
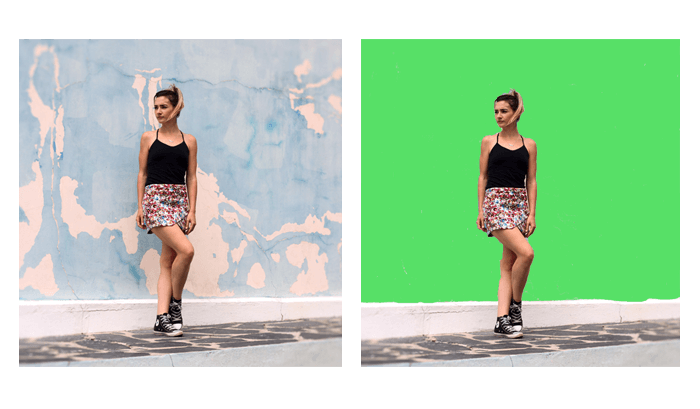
In the above image, we have first changed the color using the magic wand tool; after that, we have used the brush tool to fix the background because the background has multiple colors.
It is recommended to zoom the image while painting over the nearby pixels of the main object.
Conclusion:
We have discussed different ways to change the color & background in Photoshop. All these methods are completely dependent on your requirement, so choose a method to meet your requirement. You can also mix two methods for the desired output.
Apart from these methods, there are different ways to change the view of the image like filters, blur, etc.; you can try them too.
Also, check how to remove the background of the image in Photoshop.

.jpg)

Comments